How to Choose the Best Wood 3D Panel for Your Project?
Choosing the right Wood 3d Panel can transform a plain wall into a warm, tactile feature. However, appearance should not be the only deciding factor. A panel that looks beautiful online may feel too rough, absorb moisture, or create difficult installation problems in a real room.
Begin by considering the project’s location, purpose, and daily conditions. A living room may suit natural oak with deep geometric relief, while a hallway may need a harder, more scratch-resistant surface. In humid areas, check the panel’s core, finish, and moisture guidance carefully. Do not rely on photographs alone. Request a sample and place it under the room’s actual lighting. Small details matter.
Experienced designers also examine panel thickness, acoustic performance, weight, mounting requirements, and maintenance needs. Manufacturer specifications should identify the wood species, surface treatment, installation method, and relevant safety information. Reliable suppliers should provide clear documentation and consistent product details. If those details are missing, pause before ordering.
There is no universal best option. Personal taste can also mislead us. A dramatic pattern may dominate a small room, even when it looks impressive in a showroom. Measure the wall, test the layout, and calculate extra material for cutting and natural variation. I would also review the budget twice, because trims, adhesives, labor, and finishing can change the final cost. A thoughtful choice balances texture, durability, installation effort, and long-term comfort. Sometimes, the less striking panel performs better.
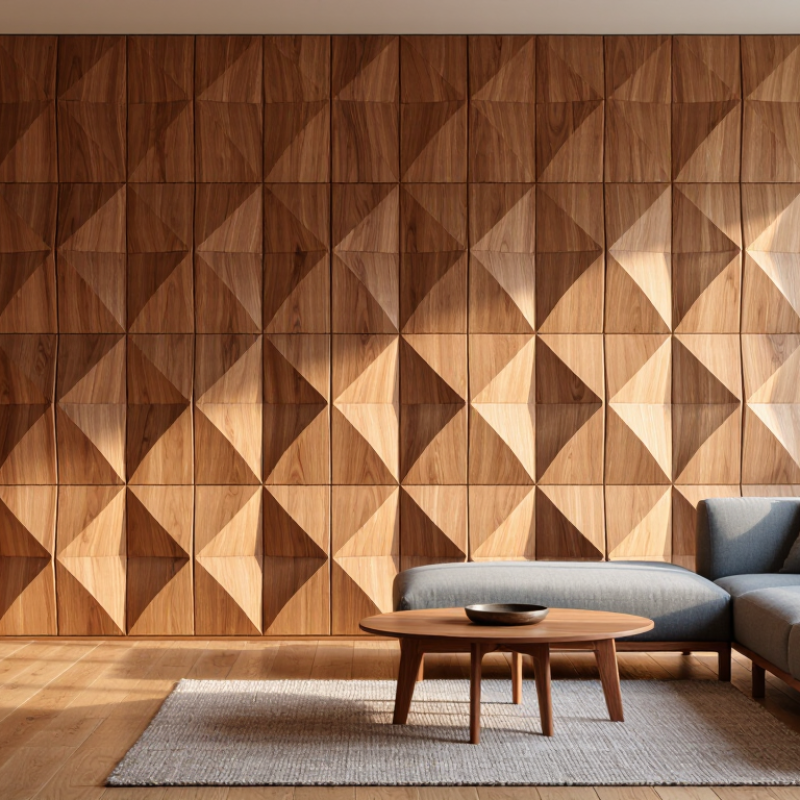
Define Your Project’s Functional and Visual Requirements
Choosing the best wood 3D panel begins with defining how the space must perform. A feature wall in a quiet bedroom has different needs from a busy restaurant entrance. Measure the wall, note nearby heat sources, and check expected humidity. Kitchens and bathrooms may require sealed surfaces and moisture-resistant backing. For offices, acoustic performance can matter more than deep texture. Ask how often the panel will be cleaned. Dust can collect in sharp grooves.
Visual requirements should support the room’s purpose. Light oak tones can make a narrow hallway feel brighter. Darker wood may create warmth in a large lounge, but it can absorb visual light. Examine sample panels under the room’s actual lighting. Warm bulbs can change the color noticeably. I once selected a beautiful panel from a showroom sample. It looked too orange beside the client’s flooring. That mistake taught me to compare samples at different times of day.
Installation details also deserve careful attention. Confirm the panel’s weight, cutting method, edge finish, and fixing system before ordering. Uneven walls may need battens or leveling work. Plan socket cuts and ventilation gaps in advance. Check product documentation for cleaning instructions, material composition, and relevant fire-performance requirements. Local building rules still apply. Do not assume every interior panel suits every public space. A small sample installation can reveal gaps, shadows, and color variation. It may feel slower, but it prevents expensive changes.
Compare Wood Species, Grain Patterns, and Panel Construction
How to Choose the Best Wood 3D Panel for Your Project?
Compare Wood Species, Grain Patterns, and Panel Construction
Choosing a wood 3D panel begins with the room’s conditions, not only its appearance. Oak offers visible pores, firm structure, and a lively grain that suits busy walls. Walnut creates deeper color and a calmer, more refined surface. Cedar is lighter and naturally aromatic, but its softer surface can mark more easily. Request a physical sample before ordering. Screens often distort warm brown tones.
Grain direction changes the entire wall. Straight grain makes narrow spaces feel taller when installed vertically. Rift-cut patterns look controlled and modern, while cathedral grain adds movement across large panels. I once selected a dramatic grain for a reception wall, but repeated curves became distracting under strong lighting. A quieter pattern would have worked better there. Light matters.
Panel construction affects installation, stability, and maintenance. Solid wood provides authentic depth, yet it can expand with humidity. Veneer over engineered board usually offers better dimensional control and a more consistent surface. Slatted panels with acoustic backing can soften echoes, especially in rooms with hard floors and glass. Check the core, backing, edge treatment, and moisture guidance. Do not assume every “wood” panel performs alike. Small details matter. Allow panels to acclimate indoors before fitting, and inspect each sheet for shade variation, because natural wood rarely matches perfectly.
Evaluate Panel Dimensions, Relief Depth, and Installation Methods
How to Choose the Best Wood 3D Panel for Your Project?
Panel dimensions should match the wall’s proportions, not only your preferred pattern. Large panels create fewer seams and a calmer appearance on broad walls. Smaller panels work better around corners, outlets, and narrow sections. Measure the wall twice, then record doors, windows, and ventilation points. I once underestimated a doorway recess, which created an awkward cut and wasted material.
Relief depth controls both shadow and maintenance. A shallow profile gives a quiet texture and collects less dust. Deeper relief creates stronger shadows, but it may overwhelm a small room. It also needs more careful cleaning. Check the panel’s actual thickness, including any backing layer. Uneven walls can make deep patterns appear distorted. A level and straightedge reveal problems before installation.
Installation method depends on the substrate, panel weight, and room conditions. Adhesive may suit a clean, stable wall with limited movement. Mechanical fasteners offer extra support on heavier panels or uneven surfaces. A batten framework can improve alignment and create space for services, but it reduces room depth. Allow wood panels to acclimate indoors before fitting. Follow the stated moisture and temperature guidance. Leave suitable movement gaps near floors, ceilings, and corners. Small gaps are easy to conceal; forced joints often open later. I still prefer a dry layout before fixing, because visual balance can change after every cut.
How to Choose the Best Wood 3D Panel for Your Project?
Evaluate panel dimensions, relief depth, and installation methods before selecting a wood 3D panel.
Adhesive Installation
Best for lightweight panels installed on clean, dry, smooth, and stable interior surfaces. It is generally most suitable for low to medium relief depths.
Adhesive with Concealed Screws
A practical choice for heavier panels, larger formats, or substrates that need additional holding strength and alignment support.
Battens or Cleats
Recommended for large panels, high-relief designs, uneven walls, or projects requiring a service cavity behind the cladding.
The chart uses representative, brand-neutral planning dimensions commonly used for interior wood 3D panel layouts. Confirm exact tolerances, weight, substrate requirements, and fixing details with the product specification.
Check Durability, Maintenance Needs, and Environmental Conditions
Choosing the best wood 3D panel starts with durability, not appearance. Examine the wood species, panel thickness, core structure, and surface coating. Dense wood usually resists dents better in busy hallways. However, hardness alone does not guarantee long service. Inspect the technical sheet for moisture tolerance, dimensional stability, and fire performance. Local building requirements still matter.
Environmental conditions
Environmental conditions can change the decision quickly. In a humid bathroom, unsealed wood may swell along its edges. In a dry room, it may shrink and reveal small gaps. Kitchens also expose panels to steam, grease, and frequent cleaning. For these areas, choose a sealed finish and leave suitable expansion space during installation. Keep panels away from direct water contact. They are decorative surfaces, not waterproof barriers.
Maintenance and installation
Maintenance should fit your actual routine. Dust textured grooves with a soft brush or low-suction vacuum. Wipe marks with a slightly damp cloth, then dry the surface promptly. Avoid harsh chemicals and soaking. A yearly inspection can reveal loose sections, fading, or lifted edges before repairs become expensive. No panel is maintenance-free. I have seen attractive designs fail because installers ignored ventilation and acclimation time. That mistake is easy to repeat. Let the panels adjust to the room before fitting them, and test one hidden section with your planned cleaner. Temperature, humidity, sunlight, and cleaning habits should guide the final choice.
Balance Material Quality, Sustainability, and Overall Project Cost
Choosing the right wood 3D panel starts with the surface, not the price tag. In a real installation, I check panel density, edge stability, moisture response, and finish consistency. Dense wood-fiber or solid-wood panels usually hold crisp reliefs better. Look closely at corners. Soft edges can signal rushed manufacturing or poor storage. Ask for technical data, including thickness tolerance, fire rating, formaldehyde emissions, and the recommended humidity range.
Sustainability needs evidence, not attractive language. Request the wood source, recycled content, chain-of-custody documentation, and adhesive emission information. A panel with recycled fibers may reduce virgin material use, but its resin system still matters. Details matter. Also measure transport distance and packaging waste. I have seen low-cost panels create expensive delays because acclimatization was ignored. Store panels flat, allow them to adjust indoors, and follow the installation guidance carefully.
Project cost includes more than the purchase invoice. Compare cutting waste, fasteners, labor time, finishing, maintenance, and replacement risk. A durable panel can cost more initially and perform better over ten years. Still, durability claims should be tested against your room’s humidity and impact level. I would build a small sample wall before ordering in volume. It exposes color variation and installation problems early. My own mistake was treating sustainability as a label rather than a measurable specification. That lesson still shapes my material decisions.