Leave Your Message

How to Choose the Right Sound Wall for Your Project?

Choosing the right Sound Wall begins with evidence, not appearance. A busy highway, rail corridor, and construction site create different acoustic problems. Vehicle speed, pavement texture, distance, wind, and nearby buildings all influence performance. The World Health Organization’s Environmental Noise Guidelines for the European Region (2018) links excessive road noise with sleep disturbance, annoyance, and other health risks. Its evidence deserves attention.

The numbers are practical. The Federal Highway Administration’s Highway Traffic Noise: Analysis and Abatement Guidance (2011) explains that effective barriers can commonly provide 5 to 10 decibels of reduction. A 10-decibel decrease is often perceived as roughly half as loud. However, that result depends on height, length, material, and placement. A small gap can weaken the whole system. Line of sight matters.

Dr. Ulf Sandberg, a leading road-noise researcher, has stated, “Tyre/road noise is the dominant source of traffic noise at higher speeds.” That insight changes material selection. Dense concrete, acoustic panels, masonry, and absorptive surfaces do not behave identically. A reflective wall may protect one property while redirecting noise toward another. That possibility is often overlooked. It should not be.

This guide compares Sound Wall options through measurable criteria, including insertion loss, durability, maintenance, visual impact, and total project cost. It also considers installation details, drainage, foundations, and long-term weather exposure. Some recommendations may remain uncertain without site measurements. That is the uncomfortable part. No catalog specification can replace a properly modeled acoustic assessment.
How to Choose the Right Sound Wall for Your Project?

Define Your Project’s Noise Control Requirements

Before choosing a sound wall, define the noise problem in measurable terms. Identify the source, operating hours, receiver locations, and acceptable sound levels. A road, construction site, and mechanical plant create different noise patterns. They also require different wall designs.

Measure existing conditions with a calibrated sound level meter when possible. Record daytime and nighttime readings near homes, offices, or outdoor gathering areas. Pay attention to low-frequency noise, which can pass through lightweight barriers more easily. Note nearby reflections from concrete surfaces. They may increase perceived noise.

A practical site review should include wall height, length, distance from the source, and the receiver’s elevation. Even a small gap can weaken performance. Check wind exposure, rainfall, drainage, fire resistance, and maintenance access. Visibility matters too. A tall barrier may reduce noise but create safety concerns or block essential sightlines.

I have seen projects focus on decibel reduction while overlooking installation gaps. That mistake is easy to make. The wall should be continuous, dense, and properly sealed at joints. Ask a qualified acoustic professional to compare predicted performance with local requirements. Predictions are useful, but field verification remains important. Conditions rarely behave exactly as planned.

How to Choose the Right Sound Wall for Your Project?

Define the required noise reduction by comparing the representative sound level at the source with the planning target at the receiver. The values below are typical A-weighted planning examples, not regulatory limits.

Use the required reduction as an initial design target. Final wall selection should also consider wall height, length, material, gaps, line-of-sight, distance, wind, ground conditions, and tested insertion-loss performance at the relevant frequencies.

Compare Sound Wall Materials and Acoustic Performance

How to Choose the Right Sound Wall for Your Project?

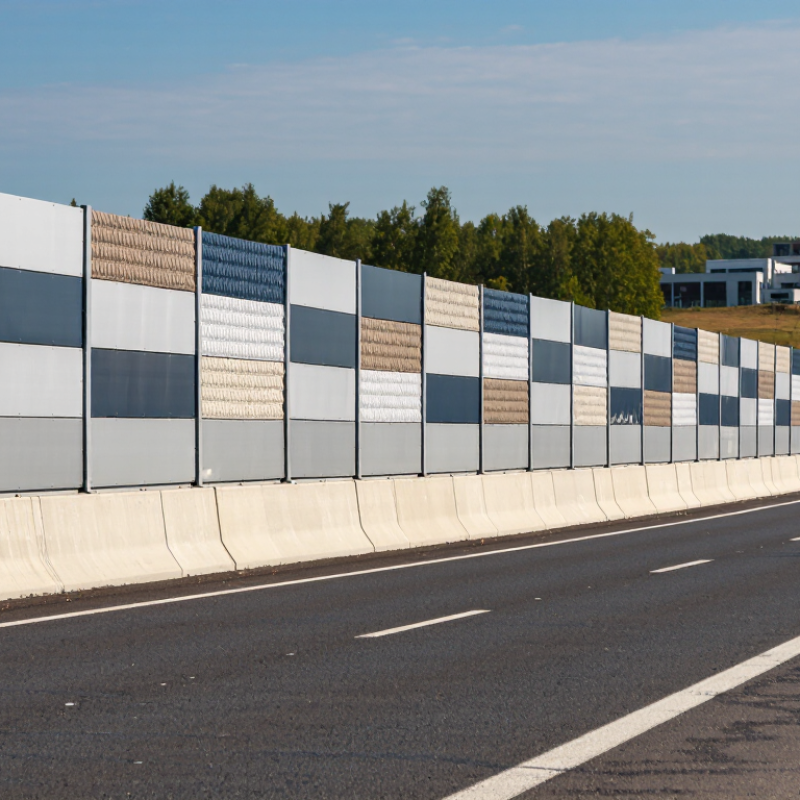
Sound wall materials affect both acoustic performance and long-term maintenance. Concrete and masonry provide high mass, resist weather, and block sound effectively when joints remain sealed. Their hard faces, however, may reflect traffic noise toward nearby buildings. Absorptive metal panels use mineral wool or similar cores to limit these reflections. They can be lighter, but damaged facings may reduce performance. Transparent acrylic or polycarbonate panels preserve daylight and sightlines. Scratches, ultraviolet exposure, and cleaning demands require careful specification. Material alone is not enough.

The Federal Highway Administration reports that well-designed barriers commonly achieve about 5 to 10 decibels of insertion loss. A 10-decibel reduction is generally perceived as roughly half as loud. Results above 15 decibels are difficult and need unusual site conditions.

Height, length, gaps, terrain, and the receiver’s position matter more than attractive samples. ASTM E90 or ISO 10140 laboratory results can compare transmission loss, but field results may differ. That gap deserves attention.

The World Health Organization recommends keeping road traffic exposure below 53 dB Lden and 45 dB Lnight. A sound wall cannot guarantee those limits by itself.

Check the existing noise map, model reflections, and inspect nearby windows before choosing materials. I would not trust a brochure’s single laboratory number. A small unsealed joint can become the weak point. Real projects are rarely that neat.

Evaluate Wall Height, Length, Placement, and Site Conditions

How to Choose the Right Sound Wall for Your Project?

Evaluate Wall Height, Length, Placement, and Site Conditions

Choosing a sound wall begins with the noise path, not the wall material. Measure the source, receiver, and nearby ground levels. A wall usually works best when it blocks direct line of sight between them. Height should rise above this line, but excessive height may add cost without meaningful improvement. Small details matter. A narrow gap can allow noticeable noise leakage.

Wall length is equally important. The barrier should extend beyond the noisy area and the protected space. Place its ends far enough away to reduce sound bending around the edges. For roads, consider traffic direction, curves, ramps, and changing elevations. A wall beside the receiver may perform differently from one placed near the source. Neither position is automatically better.

Inspect site conditions before selecting a design. Check soil stability, drainage, wind exposure, underground services, and access for construction equipment. Reflective surfaces nearby can redirect sound toward homes or work areas. Vegetation may improve appearance, but it rarely replaces a properly designed barrier. I have seen projects focus on height while overlooking an open side gap. That mistake is easy to make. No calculation is perfect. A field survey, noise measurements, and professional acoustic modeling can reveal practical weaknesses before installation. Recheck the design after construction, because terrain and surrounding buildings may change the result.

Check Durability, Safety, Appearance, and Maintenance Needs

Choosing the right sound wall starts with durability, not appearance. A wall beside a busy highway faces wind, rain, road salt, vibration, and occasional impact risks. Review the expected service life, material testing, drainage design, and repair process. The Federal Highway Administration’s Highway Traffic Noise Analysis and Abatement Guidance recommends evaluating barriers through measured insertion loss, not material thickness alone. A heavy wall may still perform poorly if gaps exist.

Safety needs equal attention. Check sightlines near junctions, pedestrian routes, lighting, and emergency access. The FHWA Roadside Design Guide highlights the importance of clear zones and crashworthy roadside features. A barrier should not create a hidden corner or block maintenance access. For community comfort, compare predicted noise levels with the World Health Organization’s 2018 guideline of 53 dB Lden for road traffic exposure. This is a planning reference, not a guarantee of quiet conditions. Local traffic, reflections, and weather can change results.

Tips: Ask for acoustic test data, structural calculations, coating details, and a written maintenance schedule. Inspect sample panels outdoors. Color can look different under wet light. Choose finishes that hide dust but remain visually calm. Keep access points visible and lockable. Do not assume “maintenance-free” means repair-free. In my experience, the neglected detail is usually the joint, not the panel. A professional acoustic consultant can model reflections before installation, although early designs are sometimes too optimistic. Allow room for inspection, repainting, vegetation control, and future road changes.

Review Costs, Regulations, Installation, and Long-Term Value

Choosing a sound wall starts with measured noise, not visual preference. The World Health Organization’s Environmental Noise Guidelines for the European Region recommends road-traffic exposure below 53 dB Lden and 45 dB Lnight. These targets help define the wall’s acoustic duty. The Federal Highway Administration’s Highway Traffic Noise: Analysis and Abatement Guidance identifies a 5 dB reduction as noticeable, while 10 dB is considered substantial. Ask for modeled results at nearby windows, patios, and upper floors. A wall that looks tall may still leave gaps in performance.

Review the full cost, not only the panel price. Include engineering, surveys, foundations, traffic control, drainage changes, permits, inspections, and future repairs. Regulations may control height, setbacks, visibility, wind loading, fire performance, and property access. Installation needs careful sequencing. Utility maps can be incomplete. That deserves skepticism. A field survey should confirm buried services, soil conditions, wall alignment, and openings before excavation. Reflective surfaces can also redirect noise toward another property, creating an avoidable dispute.

Tips: Compare life-cycle cost over 20 years. Request acoustic calculations and warranty terms. Check cleaning access and corrosion resistance. Inspect joints after the first winter. No model replaces a site walk. A low bid may become expensive when foundations change. Select materials suited to local rain, salt, heat, and freeze-thaw cycles. Recheck community expectations early; technical compliance alone may not prevent complaints.